How to Repair and Clean Grout on Marble Tiles
How to Repair and Clean Grout on Marble Tiles
Maintaining the elegance of your marble tiles extends beyond regular cleaning; it includes paying attention to the grout that surrounds them. Over time, grout can become stained, discolored, or damaged, detracting from the overall appearance of your floors. By learning how to effectively repair and clean grout on marble tiles, you can restore their beauty and enhance the longevity of your surfaces.
Understanding the specific needs of marble and its grout is essential for successful maintenance. Regular assessments and proper cleaning techniques are crucial to prevent further deterioration. This article will provide you with practical strategies and best practices for both cleaning and repairing grout, ensuring that your marble installations remain pristine.
Keeping your marble tiles looking their best doesn’t have to be daunting. With the right approach and knowledge, you can tackle grout issues successfully, making your marble surfaces shine again.
Key Takeaways
- Assess your marble tile and grout regularly to avoid major repairs.
- Use gentle cleaning solutions specifically designed for marble and grout.
- Consider professional services for extensive restoration needs.
Understanding Marble and Its Maintenance Requirements
Marble tiles are known for their elegance and durability, but they require specific maintenance to remain in top condition. Regular care helps preserve their beauty and longevity.
Cleaning and Maintaining Grout
Grout plays a crucial role in the appearance of your marble tiles. Dirty or stained grout can diminish the overall look. To maintain clean grout between marble tiles, consider these steps:
- Regular Sweeping: Remove dirt and debris regularly to prevent buildup.
- Damp Mopping: Use a damp mop with a mild, pH-balanced cleaner to avoid damaging the marble.
- Spot Cleaning: For stubborn stains, use a mixture of water and baking soda. Apply it on the affected area, let it sit, and gently scrub.
Professional Grout Cleaning
For deep cleaning, professional grout cleaning services can restore the original color and shine. They utilize specialized equipment and solutions that are safe for marble.
Maintenance Tips
- Seal Your Grout: Applying a high-quality sealer can protect grout from stains and moisture.
- Avoid Harsh Chemicals: Strong acids or abrasive cleaners can scratch the marble surface.
- Periodic Professional Restoration: Schedule a restoration every 7 to 10 years to keep your marble and grout looking pristine.
By following these maintenance practices, you can ensure your marble tiles and grout remain beautiful for years to come.
Assessing Marble Tile and Grout Condition
Before undertaking any repair or cleaning, it's essential to evaluate the condition of your marble tiles and grout. This assessment involves identifying common issues with the grout and inspecting the marble surfaces thoroughly to decide on appropriate maintenance measures.
Identifying Common Issues With Marble Tile Grout
Start by checking for signs of discoloration, cracks, or crumbling in your grout. These issues often indicate moisture intrusion or wear over time.
- Discoloration: Grout can turn dark or yellow due to dirt, stains, or water damage.
- Cracks or Gaps: Look for visible cracks that can compromise the stability of your tiles.
- Crumbling: If grout is easily broken away, it's time for repair.
Using a flashlight can help reveal small cracks or gaps that might be overlooked. Pay special attention to areas with high foot traffic and near sinks or showers, where moisture can accelerate grout deterioration.
Inspecting Your Marble Surfaces for Grout Damage
Examine your marble tiles carefully to check for loose or damaged grout. Look for irregularities that could affect the overall appearance and durability of your flooring.
- Touch Test: Gently press along the grout lines. If it feels soft or crumbles, it needs immediate attention.
- Visual Inspection: Inspect areas where water accumulates; these spots are prone to damage.
- Moisture Check: If you notice efflorescence, a powdery residue, it suggests moisture issues that need addressing.
Document any problems you find for reference during repairs. A thorough visual and physical inspection can prevent larger issues and extend the life of your marble surfaces.
Strategies for Cleaning Grout in Marble Tiles
Maintaining clean grout between marble tiles requires the right approach and solutions. Effective strategies can significantly enhance the appearance of your flooring while preventing damage to the marble surface.
Choosing the Right Cleaning Solutions
When selecting cleaning solutions, prioritize pH-neutral products specifically formulated for marble. Acidic cleaners can etch the marble, so avoid anything containing vinegar or lemon.
Consider using a mix of warm water and a few drops of dish soap as a mild alternative. You can also find enzyme-based cleaners that target stains without harmful effects on the tiles.
For tougher stains, opt for oxygen bleach solutions known for their stain-fighting capabilities. Always test a small area first to ensure compatibility with your marble tiles.
Step-by-Step Cleaning Technique
To clean grout between your marble tiles effectively, start by sweeping or vacuuming the area to remove loose debris. Mix your chosen cleaning solution in a bucket of warm water.
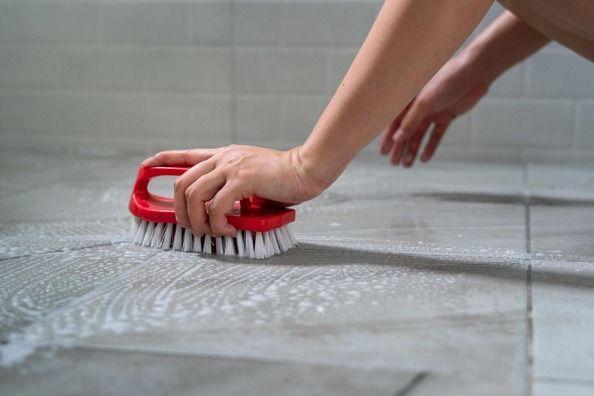
Using a soft-bristle brush, apply the solution to the grout lines, gently scrubbing in circular motions. Avoid using metal brushes that can scratch the marble. For deep stains, let the solution sit for about ten minutes before scrubbing again.
Rinse the brushed area with clean water, ensuring that no solution remains. After rinsing, dry the surface with a microfiber cloth to prevent water marks. Regular maintenance is key, so incorporate this cleaning routine into your monthly schedule.
Marble Tile Grout Repair: Best Practices
Repairing grout in marble tile can enhance both aesthetics and longevity. Understanding the right tools and techniques is crucial for effective restoration and maintenance.
Gathering Necessary Tools and Materials
Begin by assembling the necessary tools. You will need:
- Grout Float: This helps in applying grout evenly.
- Utility Knife: Ideal for removing damaged grout.
- Grout Saw: This makes cutting out old grout easier.
- Sponge and Bucket: For clean-up during the process.
- New Grout: Choose unsanded or epoxy grout, depending on your tile's specifications.
- Sealant: Protects your grout from stains and moisture.
Having these tools ready ensures a smoother repair process, allowing you to focus on achieving consistent results without interruptions.
Detailed Procedure for Repairing Damaged Grout
Start by assessing the damaged grout. Use a utility knife to carefully slice out the old grout, being mindful not to damage the marble tiles. Dust and debris can accumulate; use a vacuum or a damp sponge to clean the area thoroughly.
Next, mix your chosen grout according to the manufacturer's instructions. Use a grout float to apply the new grout, pressing it firmly into the gaps. Be sure to work in small sections to avoid premature setting.
After applying the grout, use a damp sponge to wipe away any excess from the tile surface. Allow the grout to cure for the recommended time, typically 24-48 hours. Finally, apply a sealant to protect against moisture and staining, ensuring your marble tiles stay beautiful for years to come.
Preventative Measures and Regular Maintenance
Regular care for marble tile surfaces is essential for preserving their beauty and durability. Focus on daily upkeep and long-term strategies to keep your marble tiles and grout in excellent condition.
Daily and Weekly Maintenance Tips
To maintain your marble tile and grout, incorporate simple daily and weekly practices. Use a soft broom or vacuum cleaner to remove dirt and debris, preventing scratches. For spills, wipe them up immediately with a damp cloth to avoid staining.
Weekly Cleaning Steps:
- Mix pH-neutral cleaner with warm water.
- Mop the surface gently, avoiding harsh scrubbing.
- Rinse the area with clean, filtered water to remove any cleaning residue.
Regularly checking the grout for cracks or discoloration will help you address small issues before they escalate. Consider applying a grout sealant every six to twelve months to protect against stains and moisture penetration.
Long-Term Care for Marble Tile Surfaces
In addition to routine maintenance, long-term care is crucial for the longevity of your marble tiles. Start with professional sealing of the grout, ideally annually, to shield it from absorption of spills and dirt.
Implement the following strategies:
- Schedule professional deep cleaning every 1-2 years.
- Use coasters under items that may scratch or stain to minimize wear.
- Avoid acidic cleaners that can etch the surface; stick to products designed specifically for marble.
For persistent stains in the grout, you can use a baking soda paste or oxygen bleach mixed with water. Apply it to the stained area, let it sit, and then scrub gently. This will help refresh and maintain the appearance of your marble tiles while preserving the integrity of the grout.
Professional Services for Marble Restoration
When it comes to marble restoration, professional services can make a significant difference. Your marble surfaces require specialized care to maintain their beauty and functionality.
Experienced companies offer a variety of services, including:
- Polishing: To restore shine and luster.
- Cleaning: Removing dirt and stains effectively.
- Sealing: Protecting against future damage.
- Repair: Fixing chips, cracks, or scratches.
When hiring professionals, ensure they have the necessary expertise. Look for companies that:
- Use high-quality materials and tools.
- Have positive customer reviews and testimonials.
- Offer tailored services to meet your specific needs.
By investing in professional marble restoration services, you protect your investment and enhance the appearance of your space. Regular maintenance and timely repairs keep your marble tiles looking their best for years to come.
Conclusion
Maintaining the grout on your marble tiles is essential for both aesthetics and durability. Clean grout enhances the overall appearance of your marble surfaces.
To effectively repair and clean grout, follow these steps:
- Assess the Condition: Determine if the grout needs cleaning, repair, or replacement.
- Cleaning: Use a mixture of water and mild detergent. Apply it to the grout lines and scrub with a soft brush.
- Repairing: If grout is cracked or missing, remove the damaged sections with a grout saw. Replace with new grout by filling in the gaps.
- Sealing: After cleaning and repairs, apply a grout sealer to protect against future stains.
Remember to test any cleaning solution on a small, inconspicuous area first.
Regular maintenance is key to keeping your marble tiles looking their best. You can consider professional services if the task feels overwhelming.
Taking these steps ensures your marble remains elegant and does not detract from its beauty.
You might also like